-
Open and edit the particles_vc90.vcproj file and remove the old .rules/.props files dependency.
Remove or comment out the “<DefaultToolFile FileName="NvCudaRuntimeApi.rules"/>” XML tag.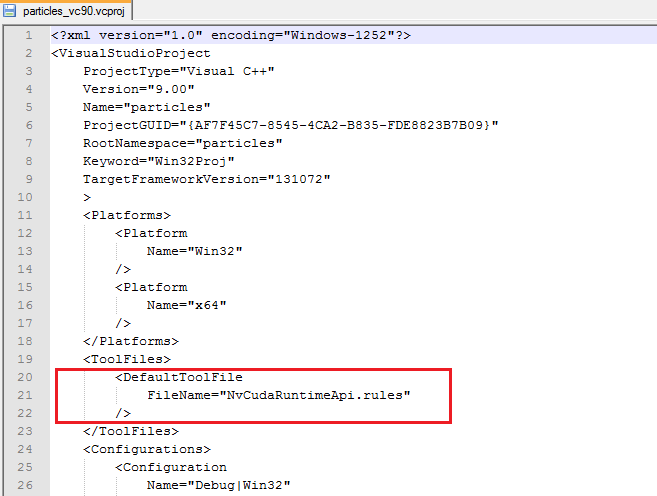
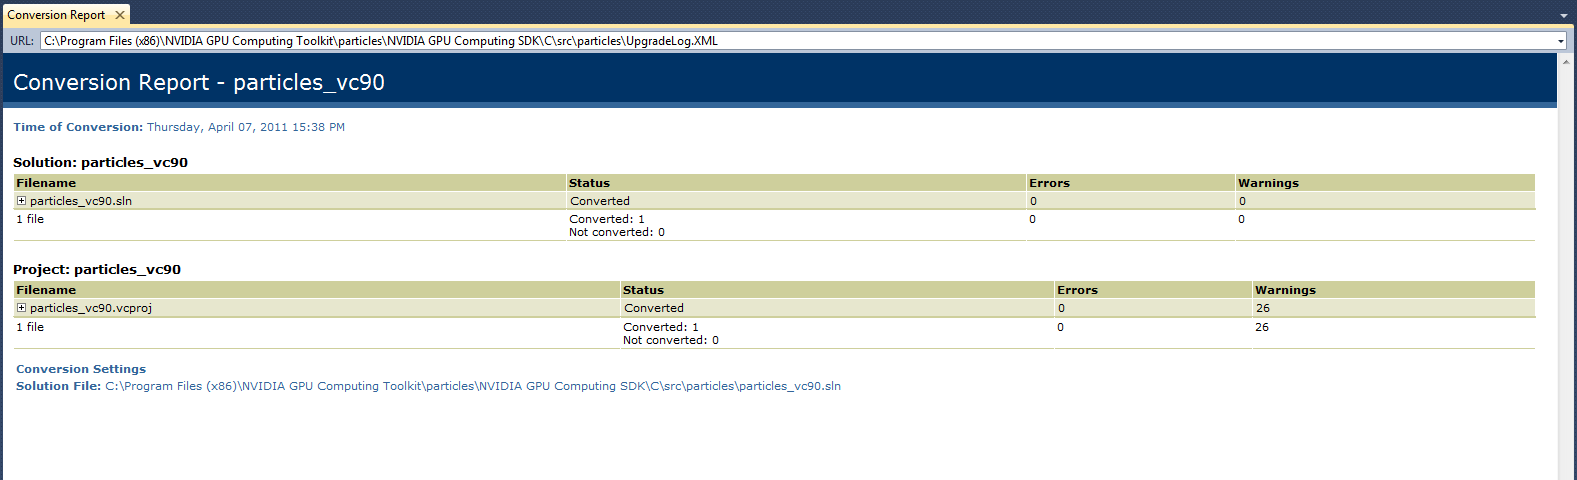
Save the edited .vcproj file after the editing is completed. - Open the edited VS 2008 project in VS 2010. The Visual Studio Conversion Wizard will then prompt for this project to be converted. Click through the wizard to convert the project.
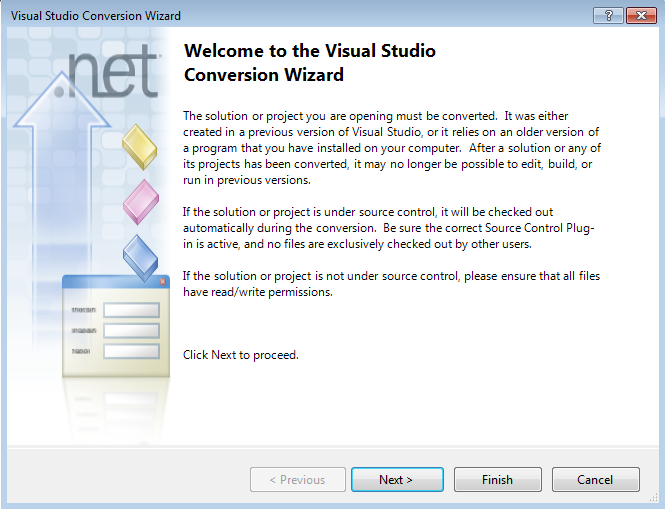
- Once the conversion wizard has completed, you will see a Conversion Report, which should indicate that the project was converted successfully.
- After the project conversion, go to the project Properties > General tab, and select the v90 Platform Toolset.
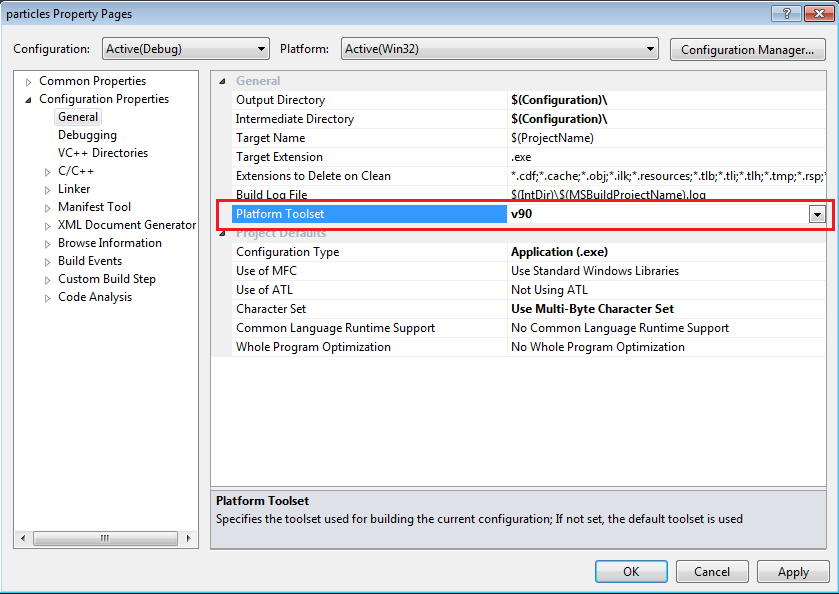

The CUDA 3.2 toolkit requires the Microsoft v90 Platform Toolset to build CUDA-based applications. This is because the NVIDIA CUDA Toolkit uses the Microsoft C++ v9.0 compiler (CL.exe) to build CUDA applications. The v90 Platform Toolset does not ship with Visual Studio 2010. For that reason, you need to install the v90 Platform Toolset, and then specify within your project properties that the v90 Platform Toolset be used as the platform toolset for building your CUDA application.
If you have Visual Studio 2008 SP1 installed, you already have the v90 Platform Toolset. If you do not have Visual Studio 2008 SP1 installed, you need to:
- Install Visual Studio 2008 SP1 (which requires a license), or
- Install Visual C++ 2008 Express Edition with SP1 (which is free).
You can download the Visual C++ 2008 Express Edition with SP1 from the Microsoft web site. However, do note that cross compiling to 64-bit is not possible with Visual C++ 2008 Express Edition with SP1.
- Access the build customization option, either by going to the project context menu in the Solution Explorer, or by selecting the Project menu > Build Customizations.
Select the CUDA 4.0 build customization file under Build Customizations.
- For the CUDA kernel files (*.cu extensions) that are not excluded from the build, right click on these files and navigate to Properties > General tab and select CUDA C/C++ as the Item Type.
In this example, we need to change the value of the Item Type field for particlesSystem.cu.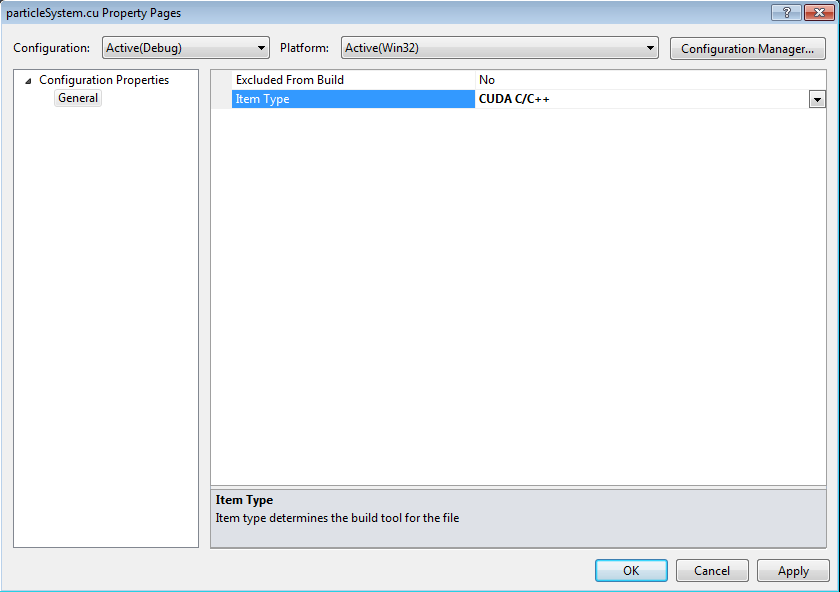
If new .cu files are added to the project after adding the build customization, step 5 would not be required as the Item Type of these newly added .cu files will be set automatically.
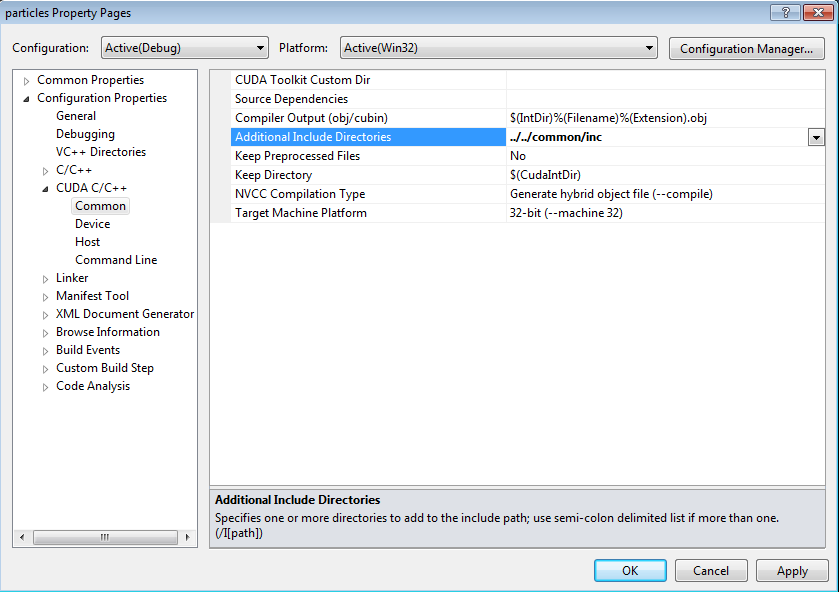
- Navigate to the project Properties > CUDA C/C++ tab.
- Under the Common sub-tab:
- Change the CUDA compiler output filename if required. In this case, we need to change the CUDA compiler output file name to $(IntDir)%(Filename)%(Extension).obj. The reason for changing this is because there is a file named particleSystem.cpp in this project. During the build, there will be a .obj file conflict if we do not change the CUDA compiler output filename to particleSystem.cu.obj.
- Specify the additional include directories if required. In this example, we need to specify the following additional include directories: ../../common/inc.
- Ensure that the Target Machine Platform field value is set to 32-bit (--machine 32).
- Under the Common sub-tab: